This year, I wanted to do more with fermentation than with water bath canning. I still did quite a bit of water bath canning, but I still had canning left over from last year, which I need to eat, so some things (such as tomato sauce) didn’t get done this year.
I have a Harsch Garirtopf 7.5 liter fermenting canister which I love, but that is pretty much for big batches of something like pickles or sauerkraut. I wanted to do some smaller fermentation projects as well. While doing some research on the internet, I came across Pickl-It, smaller airlock fermentation jars. I ordered three of them. 1/2, 3/4 and 1 liters.
I’ve been wanting to make ketchup for some time, the proliferation of ketchup on store shelves is disgusting. Highly colored, lots of additives and preservatives and just way too sweet for my taste.
Ketchup, or Catsup wasn’t always what we get now. The first ketchup was actually created in Asia and was a spicy pickled fish sauce made with walnuts, anchovies and mushrooms. It was called ke-tiap and brought to England by its sailors in the 17th century. In the late 1700’s New England began adding tomatoes to it.
Heinz began marketing ketchup in 1876, today Heinz makes many varieties. But the basic ingredients tend to be tomatoes, vinegar, high fructose corn syrup, corn syrup, salt, spice, onion powder and the ubiquitous natural flavors (which could be anything). I really want to stay away from corn syrups (which tend to be GMO as well as just really bad for us) and “natural flavors”. So it makes sense to make my own.
Fermenting the ketchup also makes sense to me. A lacto-fermented food ends up being much more nourishing than a fresh food. The lacto-fermentation process adds in probiotics and ups the nutrition value.
One of my favorite cookbooks is “Nourishing Traditions” by Sally Falon and Mary Enig. They take the principles of Weston A. Price and turn them into actual recipes. They do have several fermented recipes in the cookbook, including one for ketchup. Unfortunately, their fermentation instructions are usually for three days, which isn’t really enough for a proper fermentation.
The ingredients were
- tomato paste,
- maple syrup,
- salt
- pepper
- garlic
- whey
- cayenne pepper
- fish sauce
I played with the recipe a bit. I used half honey and half maple syrup, and added a bit of allspice and cinnamon. I also omitted the whey since the pickle-it doesn’t really need anything to jump-start the fermentation process. I also let it ferment for a week, instead of the three days.
The other thing I did was to make my own tomato paste. It was a first time thing for me and while it took a long time, the effort was truly worth while. So when my orchard store had paste tomatoes in the seconds area, I bought them. I estimate that the box contains between 25 and 30 pounds of tomatoes. Cost $16
Making paste was the most time-consuming and intimidating part of the job. It’s not something everyone will do. But consider that most tomato products are canned in BPA lined cans. While you could certainly use the 3 cans of organic tomato paste the recipe recommends, I chose to go the extra mile (or 18 hours as it were).
Making my own paste brought the price up considerably from what someone would buy in the store. But for me, this isn’t about price. This is about knowing where my food comes from and making sure it is a high quality product. If you are concerned about price, then just make sure you buy organic tomato paste.
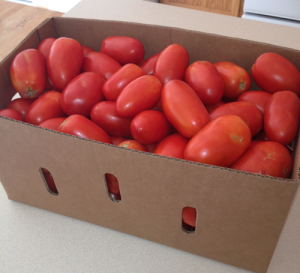
Box of paste tomatoes
My first job was to blanch and skin the tomatoes, cut them in halves and get rid of any bad spots. Luckily, there weren’t many bad spots on the tomatoes.
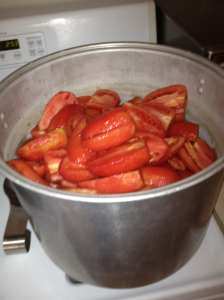
Prepped tomatoes ready to start cooking down.
The first job is simply to cook the tomatoes down until they are softened and releasing their juices. The stock pot I used was about 22 gallons. So this first part took about an hour and a half. It required regular stirring for about the first 45 minutes until enough water was released to make sure that nothing burned.
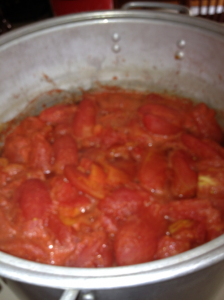
Softened tomatoes ready for the next step
Some people like to squeeze as much juice out as possible for this next step to make the cooking down process go faster. I tend to like all the juices and flavors to stay in the end product and I’m willing to compromise by extending my cooking down period. But the next step is to food mill the tomatoes and break them down while separating most of the seeds out.
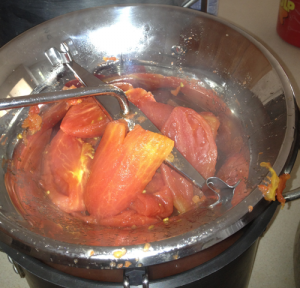
Food Milling the tomatoes
Unfortunately, I ended up breaking the legs off of my food mill this time. I was able to finish up the process, but I’m going to invest in a much better food mill for my future cooking endeavors. One thing I did this time was to double mill the pulp that was left over. I got a lot of extra pulp by doing that and minimized the amount of waste.
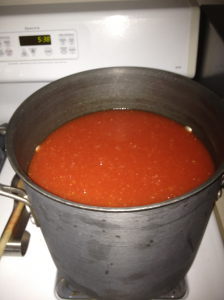
Tomato Sauce waiting to be cooked down.
I ended up almost filling a 12 quart stock pot when I was done. I cooked the sauce down for 6 hours the first night and got it down to an 8 quart stock pot that fits in my refrigerator. Once I woke up the next day, the stock pot went back on the stove for another 6 hours of cooking down.
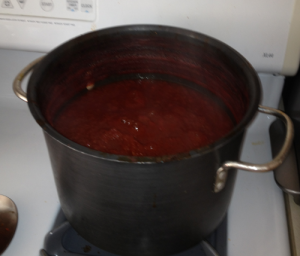
It took 12 hours for the sauce to cook down to where I wanted it. It was still fairly soupy, but the solids were sticking out and the sauce itself had deepened color to a beautiful dark red. At this point, it was ready for the oven to dry out.
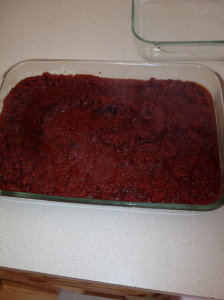
If I wanted to make a thick tomato sauce, I could have stopped here and canned it. But I want a paste and pastes are much thicker and drier. For that I needed to put the sauce into my oven. So into a glass baking dish it all went and my oven was turned to 250 degrees. I would pull it out every half hour and stir, to make sure that nothing was sticking and burning and to check on what was happening.
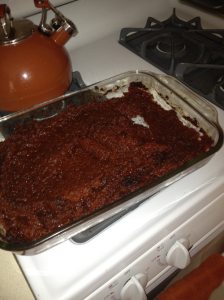
Tomato paste done after 3 hours in the oven
After three hours, I deemed it done. It was still moist but the paste was mounding up and not dripping when I stirred it. Could I have left it in for a few more hours? Probably. But after 18 hours of just making one ingredient, I was ready to move to the next step.
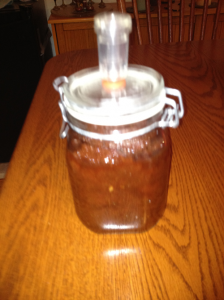
I mixed all my ingredients together and placed them in the fermenter. Remember I mentioned Fish Sauce? That is basically fermented anchovies and salt which is rendered for its juices. I ended up using about 1/2 cup of that. It’s not an ingredient I am at all familiar with, but wow, does it deepen the complexity of the ketchup.
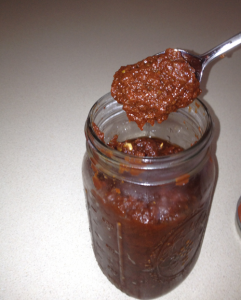
Finished Ketchup!
After a week in the fermenter, I took it out and tried it. Deeply complex and spicy. Not too sweet. Thick and rich. Making my own home-made paste was really worth the effort. I really like it. I ended up with a quart of homemade ketchup. A small amount for every day use is in a half-pint jar and the rest is in a quart jar. Since I don’t have kids I don’t need to mask it by thinning it out and placing it in a store ketchup bottle. GC has yet to taste it, but he will. But don’t tell him about the fish sauce until he has tried it. He’s pretty weird about all that.
I also ended up with extra tomato paste which I froze in ice-cube trays. So I got both tomato paste and ketchup. Not bad.
Related articles


