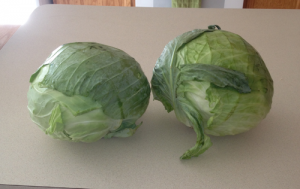
The days are cooling off nicely as are the nights. Which means its time to make sauerkraut.
Sauerkraut is simply finely shredded cabbage which is fermented. The name simply means “sour cabbage”.
Sauerkraut is traditionally made from Autumn cabbage, when the weather cools. I tend to use spring/summer cabbages for slaws.
Sauerkraut, like any fermented food has a lot of health benefits.
Cabbage itself is high in vitamins A and C and can help lower cholesterol. As well, it has anti-inflammatory properties. It just gets better when its fermented. Fermentation helps increase the digestibility of the product and contains probiotics which helps to promote a healthy gut.
Sailors (specifically German sailors) consumed sauerkraut on their sea journeys to prevent scurvy.
However, be aware that any sauerkraut you buy from the grocery store, has been pasteurized and most, if not all the health benefits are destroyed by the heating process. That means that any sauerkraut you make at home needs to be kept at below 60 degrees and can’t be water-bath canned. I keep mine in the refrigerator, but if you have a cold storage area in your basement, then it can safely live there as well.
Making sauerkraut is fairly easy, but at least for me, a bit nerve-wracking the first time. I was basically going to leave a food to rot for a period of time. I was trepidatious to say the least. But time, especially for sauerkraut is a friend, and allows all the goodness to happen.
I have been fermenting my sauerkraut for 4 weeks, I’m actually gong to let it go a bit longer this time, tasting it every week and hopefully letting it go to at least 8 weeks. The longer the fermentation process goes on (before arresting it in the refrigerator), the more health benefits accrue.
So the first thing to do is get your cabbage. I lucked out. I got two huge heads of cabbage at the Farmer’s market for $8. After that, I assembled my tools and ingredients. What ingredients are necessary besides cabbage? Salt and caraway seeds. Some german recipes also add in juniper berries, but I didn’t do that.
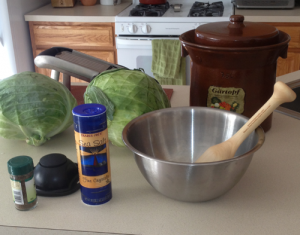
Tools and Ingredients for making sauerkraut
Tools include a mandolin for shredding the cabbage, a bowl and kraut pounder and of course the fermentation crock.
Shredding the cabbage takes the most time. While there are dedicated cabbage shredders out there, I don’t really like one use items, so I take a bit more time and use my mandolin.
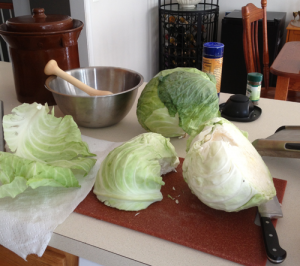
Cutting the cabbage into small enough parts for the mandolin
The first order of business is getting rid of the outer leaves and then saving some of the large inner leaves for layering at the top of the crock. After that I simply cut the cabbage into a small enough bit for my mandolin to be able to handle and start shredding. Inevitably the larger leaves on the outside don’t shred, but I simply use my knife to shred those as well rather than wasting it.
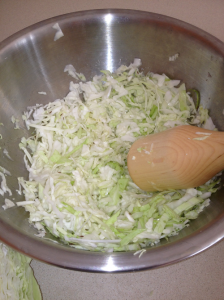
Pounding Salted Cabbage
For each slice of cabbage that I shred, I sprinkle some salt and caraway seeds on it (I am using Sandor Katz‘s recipe from Wild Fermentation of 3 tablespoons salt, 1 tablespoon caraway for every 5 pounds of cabbage). I let it sit and then start pounding it. Pounding the cabbage breaks down the fibers and starts releasing the juices. I start pounding in a large bowl, because I really don’t want to break my crock. After a few sessions of shredding, salting and pounding, I move the resulting mixture to my crock and pound in there as well.
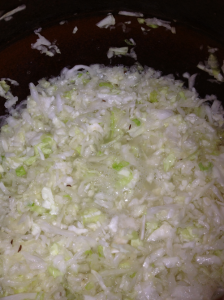
Juices rise within the pounded salted cabbage
You can see in the crock, that the juices are rising. That’s good since I want the juices to fill the crock and go over the weights.
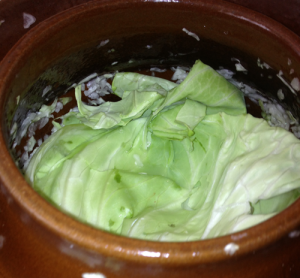
Lining with a Leaf
Once I get the cabbage pounded down and have the crock filled, I place a cabbage leaf on top. This helps to keep all the sauerkraut from rising above the weights.
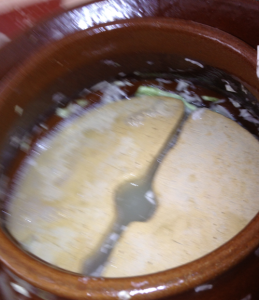
Cabbage Juice above the weights
I finally add the weights in and luckily for me, the juice rose above the weights. If it hadn’t, then I would have needed to add some brine in.
I have to tell you that I bought a kraut pounder this year and it made all the difference in being able to easily break down the cabbage. This is the first year, I haven’t needed to fill it with a brine.
After filling the crock, I still had some cabbage left, so I filled a 1 liter pickl-it as well. At this point I should get about 7 quarts of sauerkraut. Figuring $8 for the ingredients that is about $1.14 a quart. Less then half of what I would spend in a supermarket and a heck of a lot better for me.
The crocks have been moved to my basement and now its simply a waiting game. I need to check them weekly and make sure the water reservoirs are filled which also helps to keep the smell down). I’ll have another blog post on the sauerkraut when I jar it.
Related articles


